Uninstall KeePass in A Quick and Complete Way
Do you want to uninstall KeePass but can't find where it is? Or it is hard to remove it from your web browser? Don't worry, let's see what happen and figure it out.
What is KeePass?
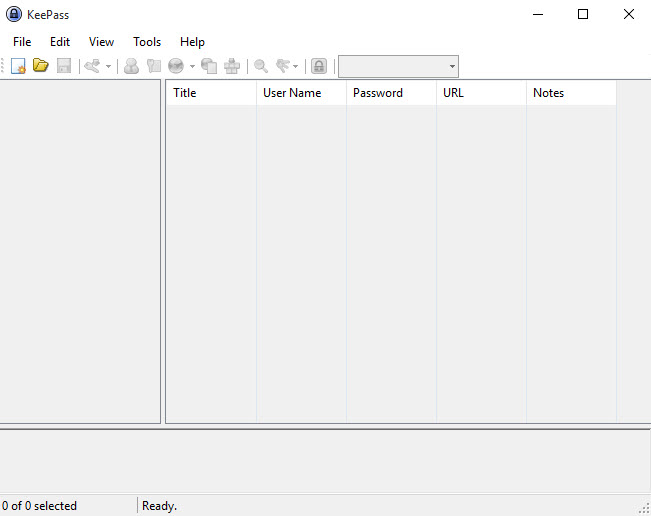
KeePass, also known as KeePass Password Safe, is an open-source password manager that available for free. It is primarily for Windows and help users to manage their passwords in a secure way, and allow them to quickly find and access the specific password.
Some people find that the KeePass program just enter on their computers silently without their notices. So they are not clear about what it is and where it is on the PC. If you also get the same problem, you can check the general install information of the program at the following:
- Product's official website: keepass.info
- Default installed directory: C:\Program Files\KeePass
- Program executable: keepass.exe
- Additional install files:
ShInstUtil.exe
KeePassLibC32.dll
KeePassLibC64.dll
KeePass.XmlSerializers.dll
unins000.exe
Problems with removing KeePass
When people decide to uninstall KeePass, they might encounter some problems to perform the removal, such as cannot find the app's uninstall process, unable to clear it from web browser, and don't know where they should go to start the program removal... To perform the uninstallation smoothly on the PC, you can check the removal instructions below.
Uninstall KeePass with optional ways on PC
1.Conduct a quick removal with Total Uninstaller
Total Uninstaller is a smart app uninstaller that can help you uninstall programs installed on Windows PC. It is able to perform a quick and automatic removal for the program, and enable you to get a complete uninstallation in a short time. To uninstall KeePass with this utility, you can refer to the following instructions and video guides.
- Install and start Total Uninstaller on the computer
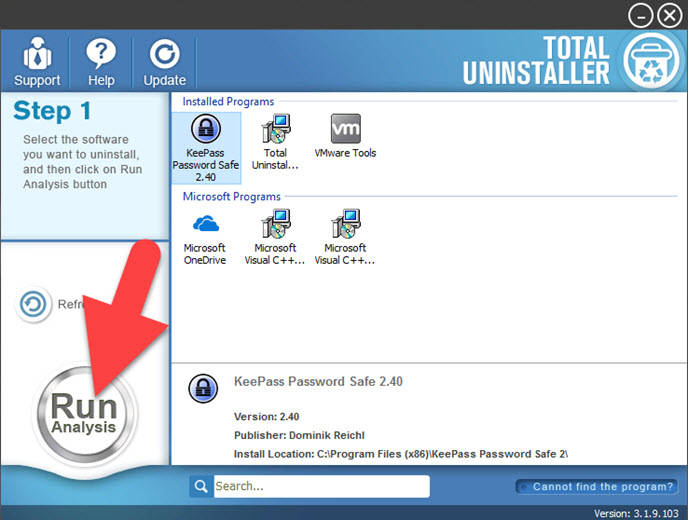
- Select KeePass on the menu of installed programs, and click on Run Analysis
- After a while, associated files and components will then be detected and listed on the menu, and please click on the Complete Uninstall button
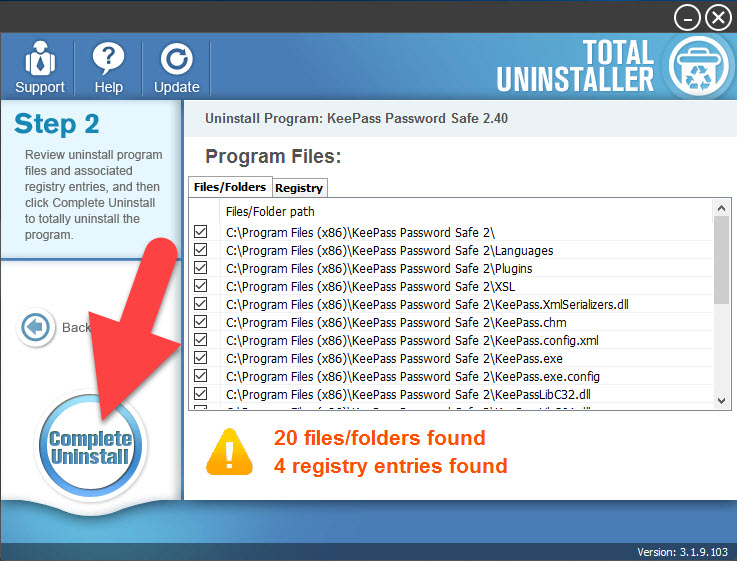
- Click Yes to make sure that you want to completely remove KeePass Password Safe

- Wait until the removing process finished, and click OK to exit
- After that, continue to click on Scan Leftovers button, and delete all of detected files on the list
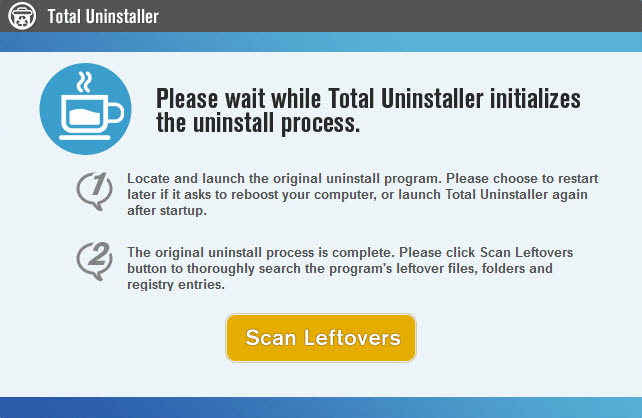
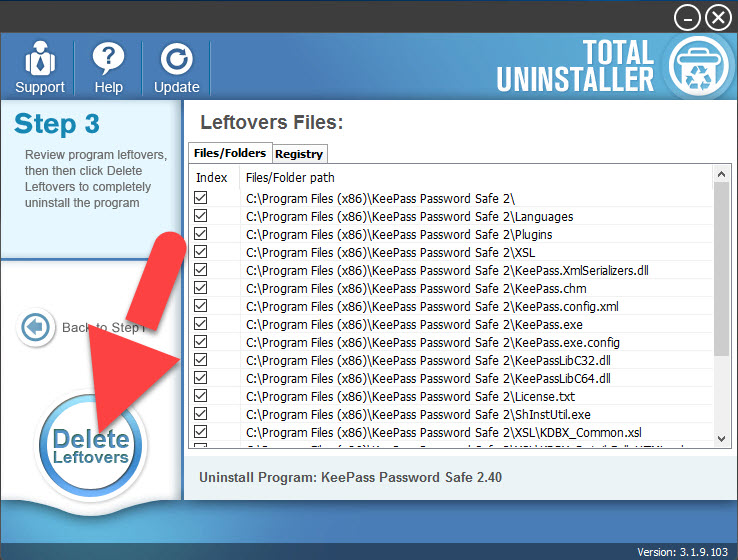
- Click on OK to complete the whole removal, and then you can exit the uninstaller and restart the your computer


2.Apply Windows removing feature to uninstall KeePass manually
Step one: uninstall the program
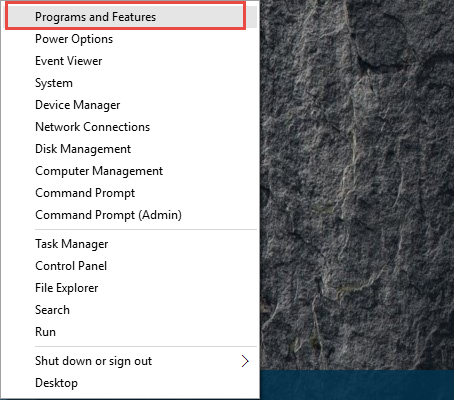
- On the computer desktop, right-click on the Windows button
- Select the firstly item "Programs and Features", which will take you to the specific removing feature in Control Panel
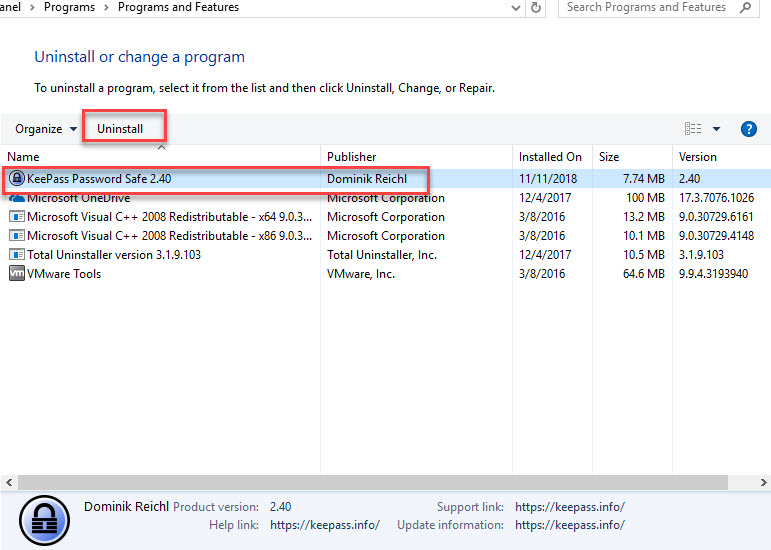
- Highlight KeePass on the list, and click Uninstall
- Click Yes to confirm the removal, and removing process will start

- Click OK when a message displays and tells you that the KeePass Password Safe was successfully removed.
- Close all the running programs and reboot the computer
- Go to the Windows' search box, and type "regedit"
- Click to open the Registry Editor from the search result
- Expand the registry groups inside, and delete the registry key/entry which are belonging to the KeePass
Step two: clear its traces and extensions on web browser
KeePass's extensions and add-on are usually left behind after being uninstalled by the Windows built-in remover. In this case, you should take additional steps to clear its traces on the web browser manually.
Delete add-on and extensions in different web browser:
In Google Chrome
- Open Google Chrome, click on the menu icon (with three bars/gear)
- Click on Tools, and then Extensions
- Disable and remove KeePass extensions
In Firefox
- Launch Firefox, click on the icon with three bars or a gear, select Add-ons
- Click on the disable button of KeePass toolbar
In conclusion, to uninstall KeePass and other applications, taking a good uninstaller is obviously a quick option; if you don't want to take any cost, you will have to uninstall it and clean its leftovers completely from the computer.


