Remove IObit Uninstaller from PC-Uninstall Guide
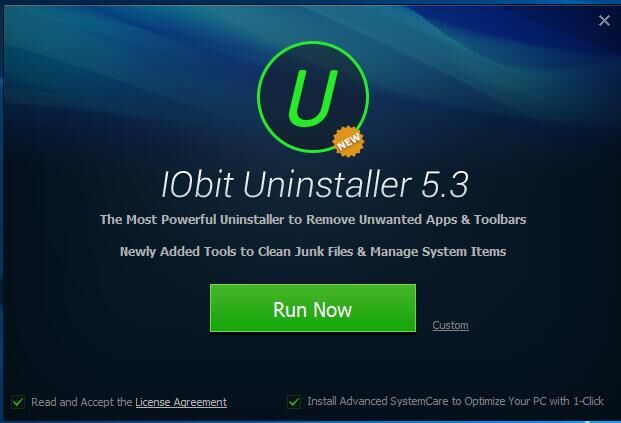
IObit Uninstaller serves as a useful uninstaller for computers, yet as a tool to remove programs, it is unable to uninstall itself. So, what would you do if you needed to remove IObit Uninstaller? It won’t be an easy job to totally remove IObit Uninstaller, yet if you have found the correct and complete instructions; you can fulfill your goal. This article presents the different ways to help you thoroughly remove IObit Uninstaller from your PC.
Traditional way to remove IObit Uninstaller
This is the manual way to uninstall IObit Uninstaller, which requires several steps to perform. Given that there are different versions of Windows OS, you can choose the steps according to your system version.
Step 1: Exit the process of IObit Uninstaller via Task Manager on your computer.
- Right click on the taskbar on the bottom of your screen and then select “Start Task Manager”.
- Click on the Process tab to see the currently running programs and then choose “Show processes from all users”
- Click on the IObit Uninstaller if it is active, and then click on “End Process”.
You can also press down Ctrl+ Alt+ Delete on your keyboard to switch on the Task Manager and end the process of IObit Uninstaller.
Step 2: Remove IObit Uninstaller with Windows Control Panel
Windows system allows users to use the Add/remove feature to uninstall unwanted programs, and there is how it works. Note that you will need to choose the instructions suitable for your OS version.
For Windows 7:
- Click on Start button, and then choose Control Panel from the menu list, and then you will be directed to the Control Panel interface.
- Choose Programs
- Select IObit Uninstaller and then click on Uninstall button
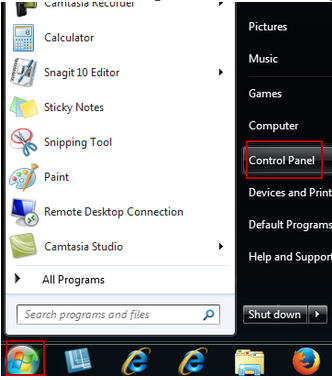
Follow the uninstall wizard to remove IObit Uninstaller, and then reboot your computer to ensure a successful uninstallation.
For Windows 8:
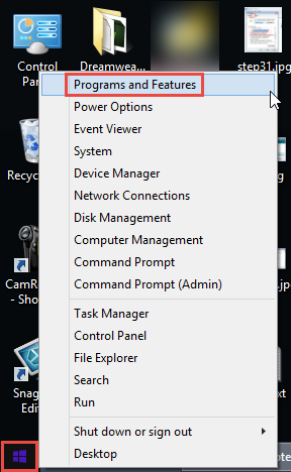
- Click on Start>Control Panel> Programs and features
- Select IObit Uninstaller from the list and then choose “Uninstall”, and then just follow the uninstall guides to remove IObit Uninstaller.
- Restart your computer.
For Windows 10:
- Click on Start button, and then select “Settings”.
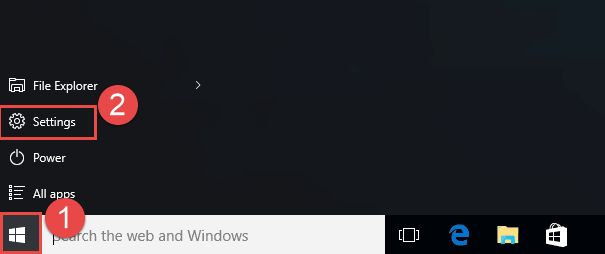
- Choose “System” and then head for a new window.

- Click on Apps and features on the left-hand side bar on the System interface.
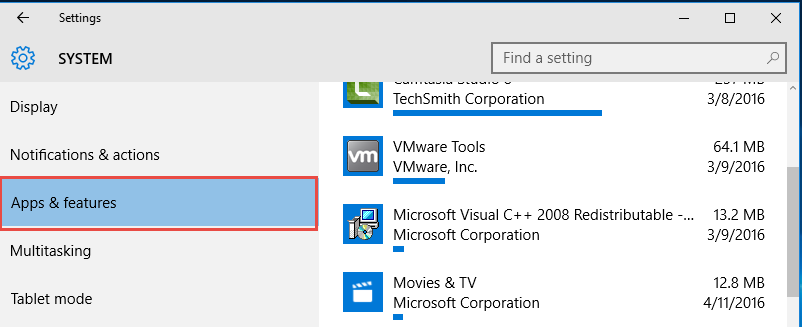
- Scroll down to locate IObit Uninstaller, click on IObit Uninstaller and then choose “Uninstall”.
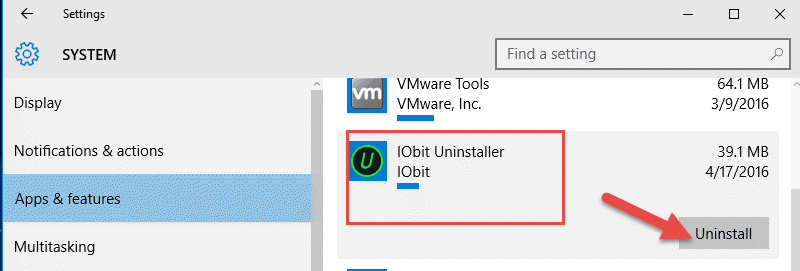
- Confirm your performance by clicking “Uninstall” in the pop-up window.
Step 3: remove the leftovers of IObit Uninstaller
After removing the main files of IObit Uninstaller, now it is time to delete the components such as the registry entries, junk files and folders of IObit Uninstaller.
- Delete registry entries:
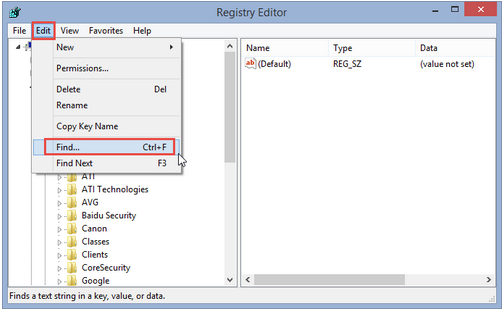
Enter “Regedit” in the search bar next to the Start button, and then click on Regedit to launch Registry Editor. - Click on “Edit” tab and then select “Find” in the Registry Editor window. Or alternatively, you can press down “Ctrl+F”.
- Enter “IObit Unisntaller” and then click on “Find Next” tab.
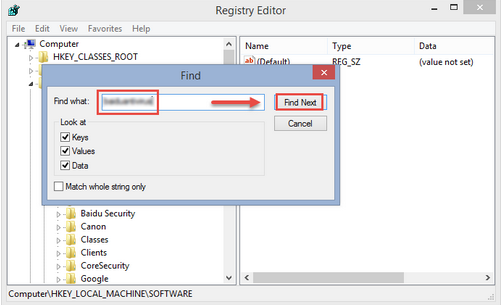
- Delete the registry entries of the unwanted program if you found
Remove IObit Uninstaller with its built-in uninstall program
There is another way you can uninstall IObit Uninstaller from your computer.
- Right click on the IObit Uninstaller and then select “Open file location”.
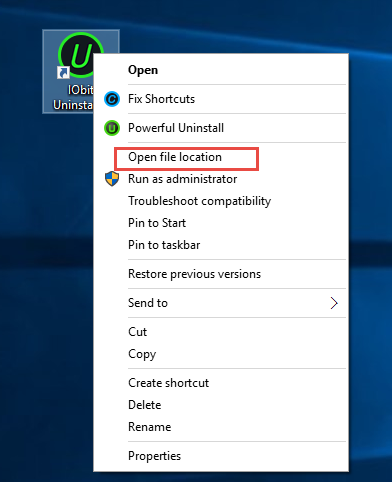
- Scroll down and find out the program displaying as “unins 000”, double click on it to launch the program.
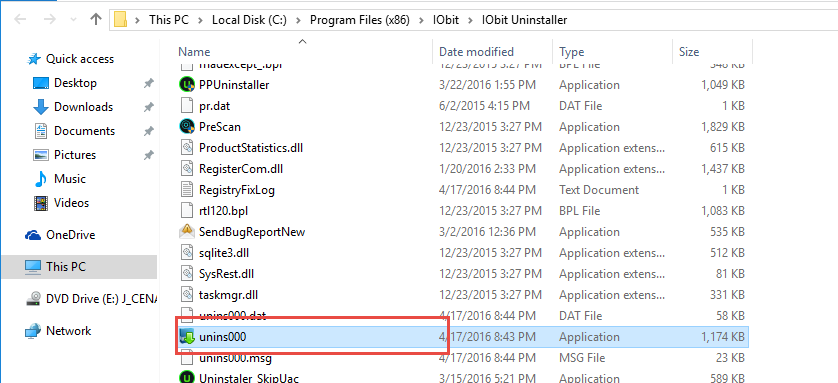
- Remove IObit Uninstaller following the prompts.
There have been two approaches above to remove IObit Uninstaller, one is the complicated manual way and the other is to use the built-in uninstaller. However, chances are you may all fail to uninstall IObit Uninstaller with these two methods for some reasons. Even you can perform the uninstallation following the instructions above, it can be time-consuming.
Besides, you may have to uninstall the affiliated programs of IObit Uninstaller, such as the Advanced SystemCare, or some other programs, which means there are more works to do expect to uninstall IObit Uninstaller itself. Therefore, if you just can’t remove IObit Uninstaller with those two methods, or you just want to take a shortcut to achieve your goal, there is one.
Remove IObit Uninstaller automatically with a third party uninstaller
Removing IObit Uninstaller via a professional uninstaller can be easy, and you will just need simple steps to perform the uninstallation. Get your own uninstaller now and then get started to completely remove IObit Uninstaller right now.
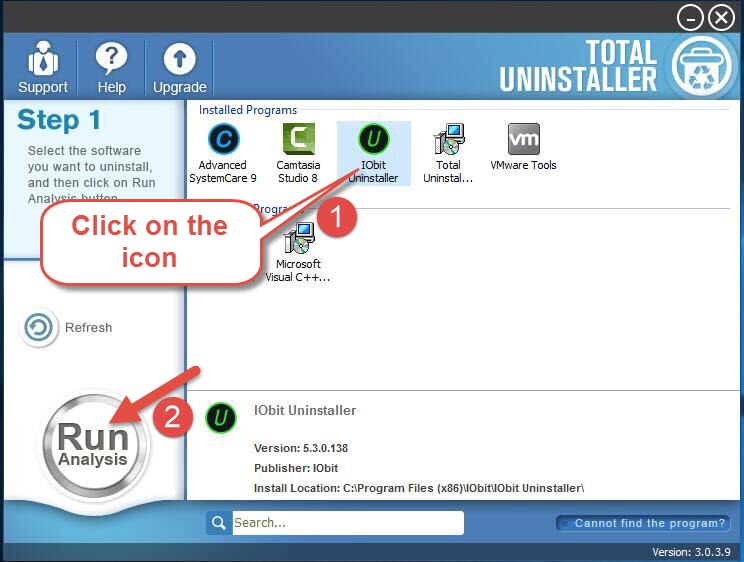
- Steps 1 Launch the uninstaller, select IObit Uninstaller and then click on “Run Analysis”.
- Step 2 Click on “Complete Uninstall” and then select “yes”.
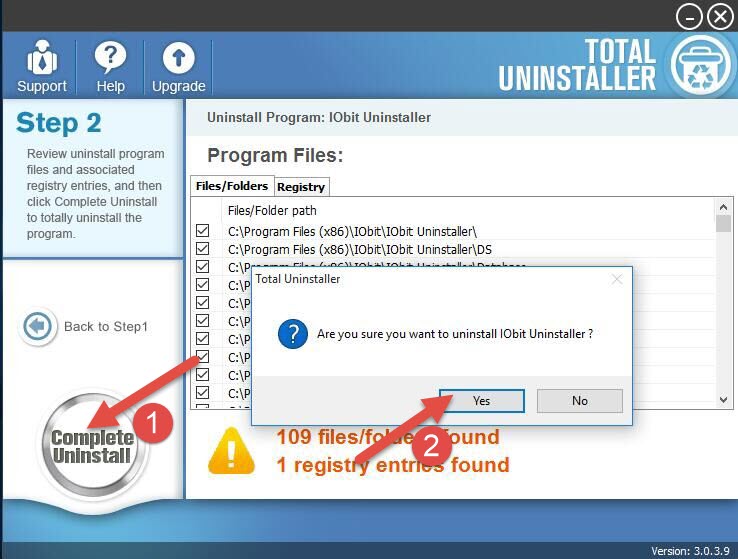
- Step 3:Make confirmation of your removal in the prompts.
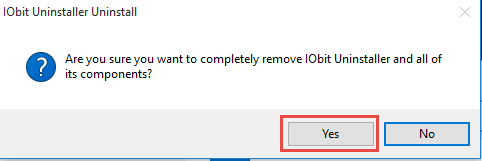
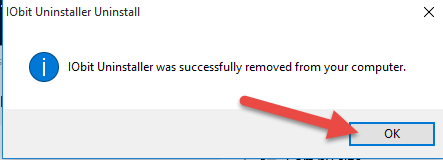
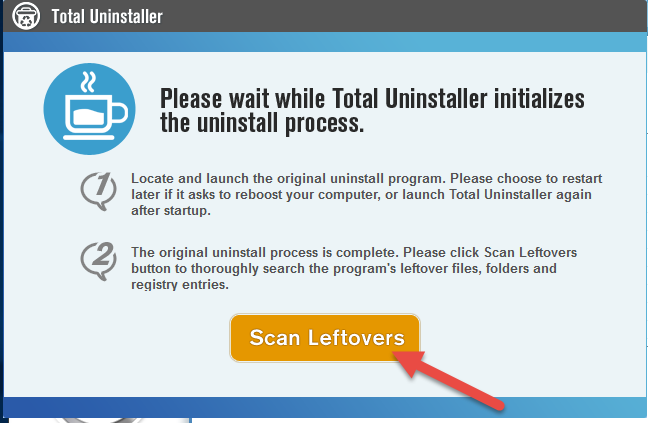
- Step 4: click on “Scan Leftovers”.
- Step 5: Perform “Delete Leftovers” and then confirm your performance.
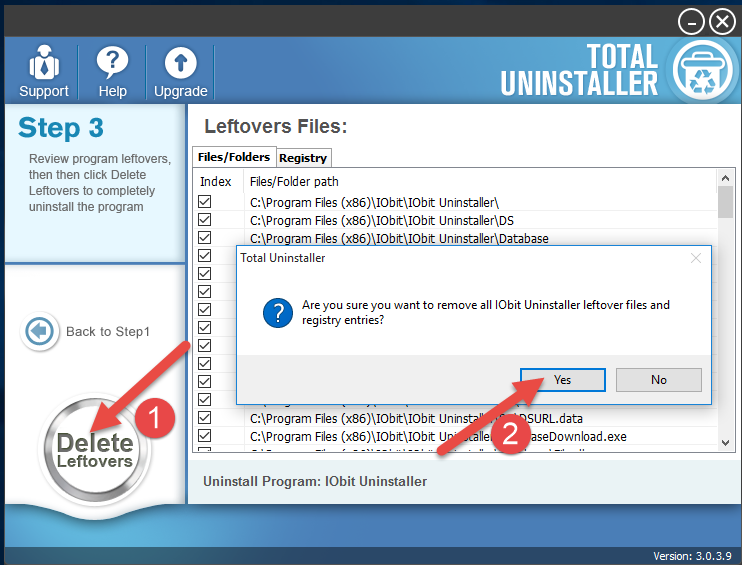
The automatic method requires all together five steps to remove IObit Uninstaller, yet still, it is easier to perform for all you need to do is to click on your mouse and wait for the process. You don’t need to search for the leftovers of IObit Uninstaller, which will save much time for you. If you prefer a fast removal and do not want to waste much time, it will be a better option to use a third party uninstaller to remove and get rid of IObit Uninstaller from your computer.


