How to Fully Remove PCKeeper on Windows
How can I uninstall PCKeeper without causing troubles? Have no clue how to sweep out all its traces on your system? You will find the answers in this removal guide.
What is PCKeeper & Why to uninstall it?
PCKeeper is an optimization software that claims to keep your PC in top-notch condition and protecting it from threats. Users are usually induced to install this program to eliminate errors, bad registry entries and junk files from their computer.
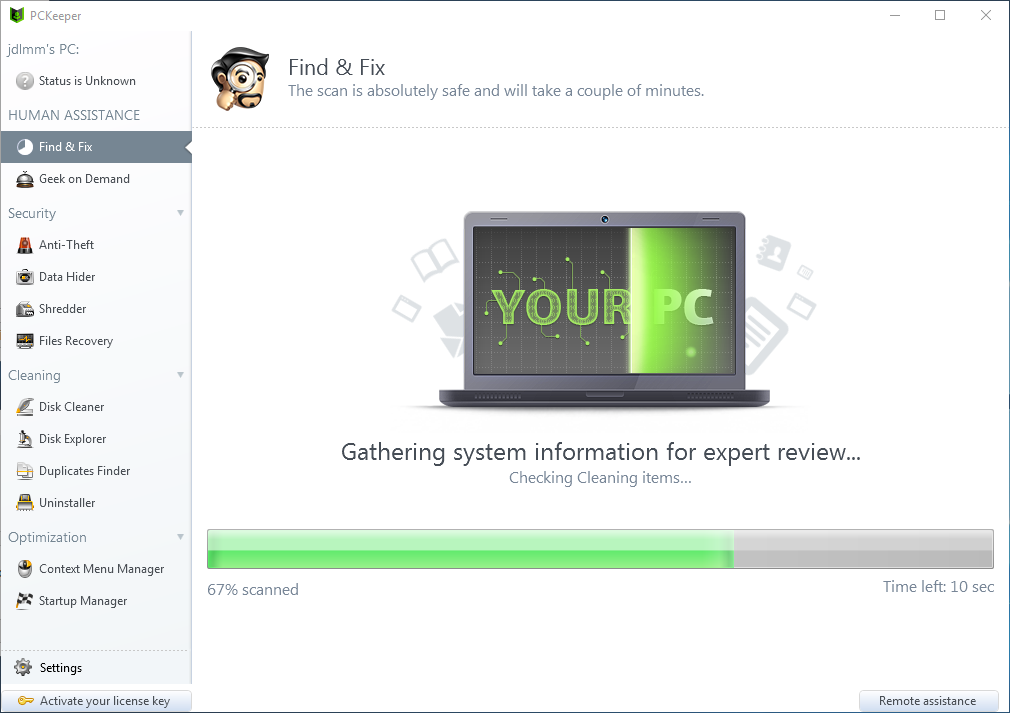
However, to fix what it calls security issues, you will be directed to purchase its licensed version priced at $39.95. Though PCKeeper has lots of certifications from different testing titans, users may still have doubts on its legality and effectiveness. Many reviewers also comment that it tends to exaggerate the severity of scan results and promote users to purchase the license key by presenting fake infection reports. Once you get PCKeeper installed, it may cause many troubles on your computer, such as annoying pop-up ads, continuous system scan reports, and system slowdowns.
When talking about system optimization, you have multiple (and free) software alternatives. We suggest you to uninstall PCKeeper immediately. To help you uninstall PCKeeper with no trace left, we offers two main solutions for your reference.

Conventional Means: Uninstall PCKeeper Steps by Steps
First of all, you can follow the standard uninstall process to get rid of PCKeeper.
Step 1: deactivate program
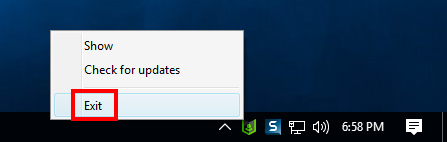
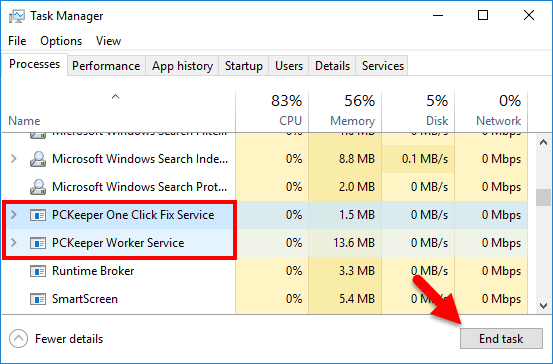
No matter how you decide to uninstall PCKeeper, you should always turn off the program completely prior to the uninstall. If the program is running, right click on its icon and choose Exit from the list. To check if related process still runs on the background, you can launch Task Manager and terminate its processes from there.
- Right click on the taskbar and then choose Task Manager option.
- Select process(es) pertaining to PCKeeper, and click End Task.
Step 2: uninstall PCKeeper
Different OS users might perform slightly different steps during the uninstallation.
On Windows 7:
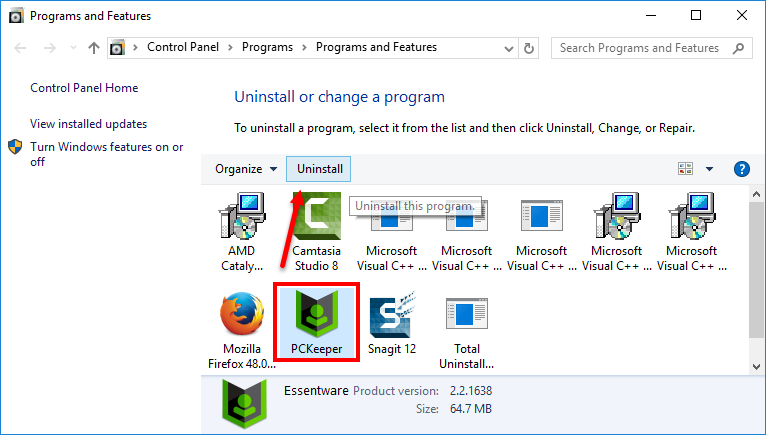
- Head to Start > Control Panel > Programs, and click the Uninstall programs link.
- Scroll through to select PCKeeper from the list, and click Uninstall button.
On Windows 8 &10:
- Right click on Start menu and then click Programs and Features from the list.
- Select PCKeeper in the list, and click Uninstall to start the uninstallation.
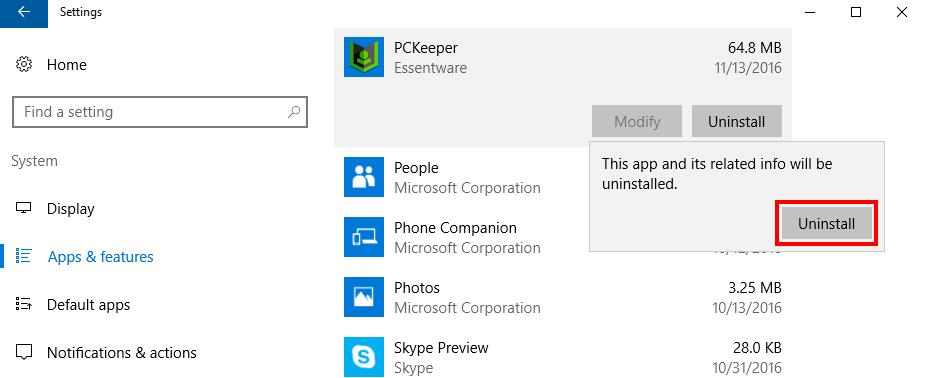
Windows 10 users can also manage installed apps from the Settings app. Here is how to uninstall PCKeeper in Settings. Click on Start menu > Settings, and then click on the Apps & features in the left-hand sidebar. As the list in the right-hand extends, select PCKeeper, and click on the Uninstall button twice.
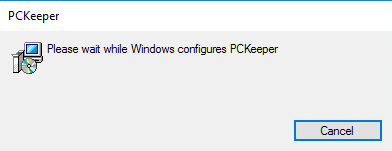
- In the uninstall wizard, click on Yes and wait for the configuration.
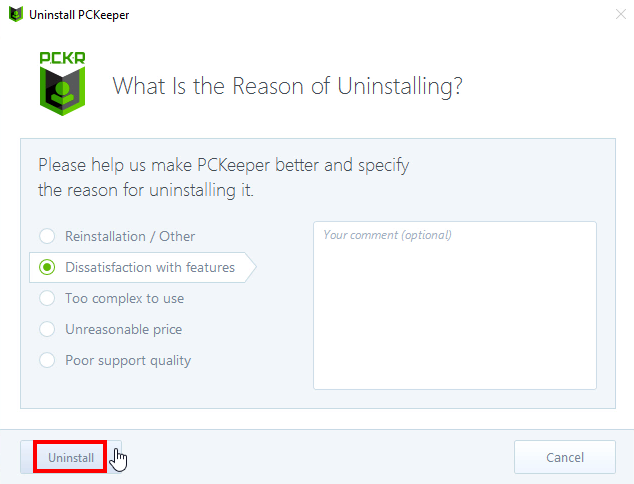
- When prompted, choose a reason from the list and click on Uninstall.
Tip: If PCKeeper has been corrupted, or some of its main executive files are missing, you may fail to uninstall it by standard way. To solve the issues, you can re-install the program to cover those problematic files, and then uninstall PCKeeper in the Safe Mode.
Step 3: delete leftovers
PCKeeper now should have been removed from the list of install programs, but you may notice that some of its components, like registry entries, invalid shortcut or installation folder, still scatter around your system. To fully delete PCKeeper traces, you are supposed to search and then remove them in Registry and hard disk.
1) keys & values in registry
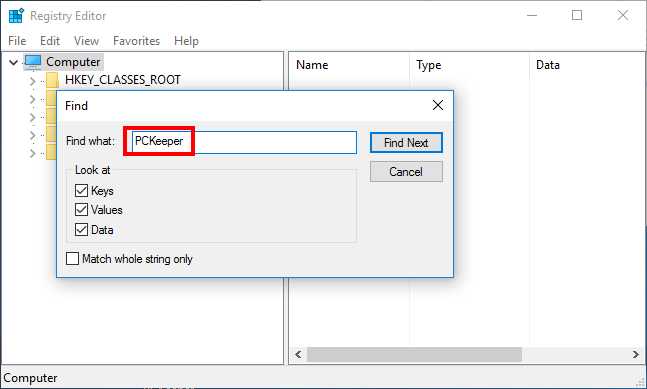
- Go to Start > Run, type "regedit" and hit Enter to launch Registry Editor.
- Click Yes if you are prompted to give confirmation in UAC dialog.
- Click the Find from Edit menu, type PCKeeper in the Find box, and then hit Enter key to start searching matched items in Registry.
- Once found, right click on the key or value and choose delete option from the list.
- Hit F3 to locate the next entry associated with PCKeeper.
Warning: You must be very cautious when making changes on Windows Registry. Inexperienced users are not recommended to modify the registry without making a backup copy, cause serious issues may occur if you mistakenly delete keys or values there. If you are not confident in accomplish this part, we suggest you to utilize an professional uninstaller or a registry cleaner to get the job done automatically.
2) files & folders in hard drive
- Head to Start > Control Panel > Folder Options, and then select the View tab.
- Check the "Show hidden files and folders" in Advanced settings and click OK.
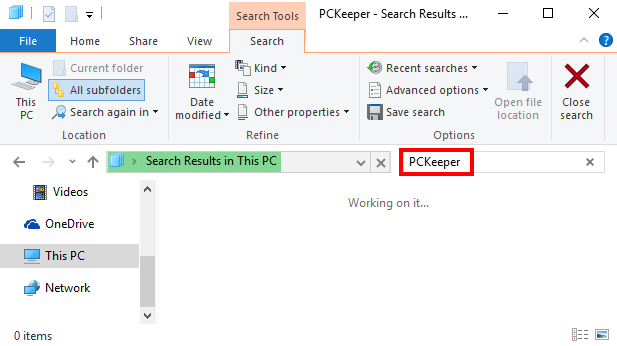
- Click This PC on the desktop (or press Windows + E ) to open File Explorer.
- Type PCKeeper in the Search Bar.
- Identify and delete PCKeeper components in the search result.
Now we finally come to the end of manual uninstallation. Some users may think the operations are a little troublesome or complicated to perform by their own. If you are looking for a hassle-free and time-saving way to uninstall PCKeeper, a professional, handy and reliable uninstaller can be a good choice to help you handle the task.
Recommended Solution: Remove PCKeeper with Total Uninstaller
For those users who value their time much or lack adequate skills in program removal, we highly suggest them to use an all-in-one removal tool to uninstall all kinds of unwanted programs. Total Uninstaller is a handy utility equipped with powerful uninstall engine. Let’s see the operations it requires to fully uninstall PCKeeper.
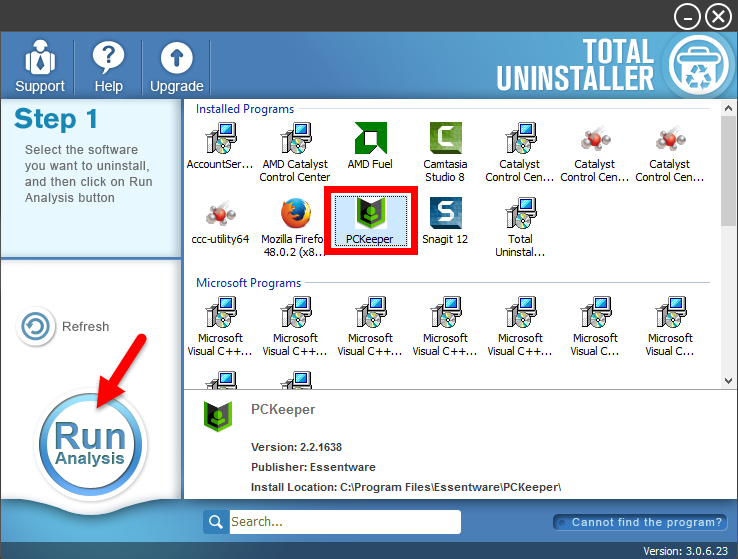
- Launch Total Uninstaller after terminate PCKeeper in Task Manager.
- Click on the PCKeeper icon, and click Run Analysis button to scan it.
- Click on Complete Uninstall after all the components have been scanned out.
- Click Yes in the dialog and follow on-screen prompts to complete the uninstall.
- Click on Scan Leftovers and then Delete Leftovers to perform complete removal.
- Click Yes to confirm and then OK to exit PCKeeper removal.
[Video Tutorial - How to Uninstall PCKeeper in 3 Simple Steps]
Total Uninstaller is capable of locating all traces of target program. Generally, you will only take 3 steps to perfectly get rid of any unwanted program on Windows.
Force Uninstall: for the program that does not show up in the interface, you can perform a force uninstall. Here is how to do: click “Cannot find the program” button in Step 1, specify the installation folder of target program in the pop-up window, and click Scan button to continue normal uninstallation. This mode is especially designed to remove those corrupted/problematic/malicious/stubborn programs forcefully.
In a word, this tutorial shows why and how to uninstall PCKeeper on Windows machine. Choose the method you prefer and get rid of target program effectively.
Anytime you encounter uninstall issues, feel free to contact our expert team for help.