How to Uninstall AOMEI Partition Assistant Standard Edition
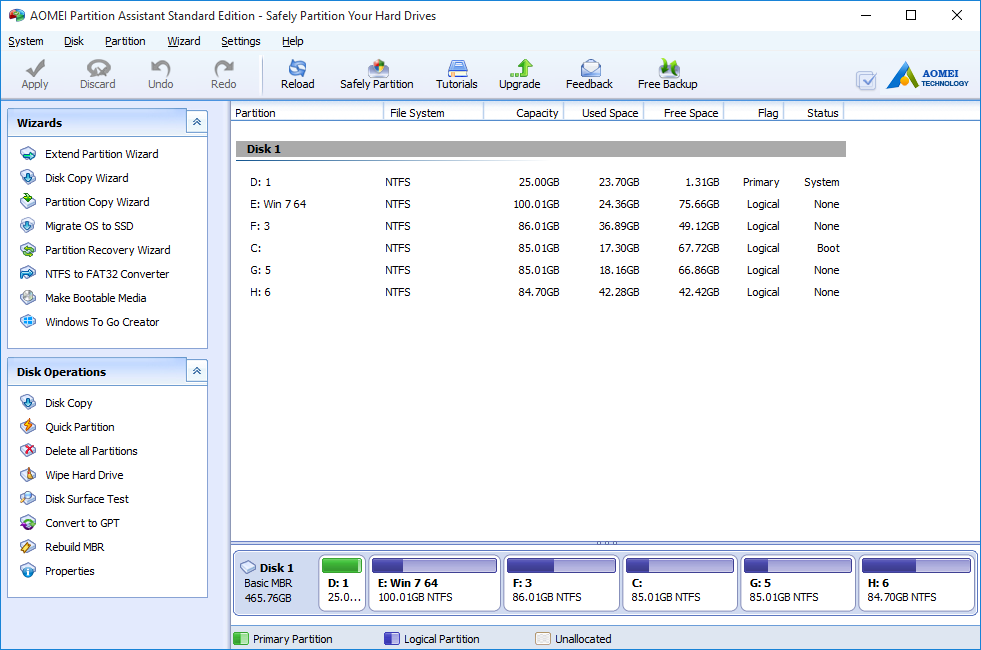
AOMEI Partition Assistant Standard Edition is a free disk partition management software with comprehensive features. Users can perform many complicated partition operations such as creating/wiping partitions, migrating OS to SSD, converting NTFS to FAT32 partition, disk surface test, repartition hard drive without losing data, etc. AOMEI Partition Assistant might be an advantageous program to manage drives on your computer. But if you feel that it fails to meet your demand, we are here to assist you in uninstalling AOMEI Partition Assistant Standard Edition on your machine.
Improper uninstallation will trigger many issues on your system. You may wonder, “how can I fully uninstall AOMEI Partition Assistant without hassle?” In this post we list several approaches to help you get rid of any unwanted program on Windows.
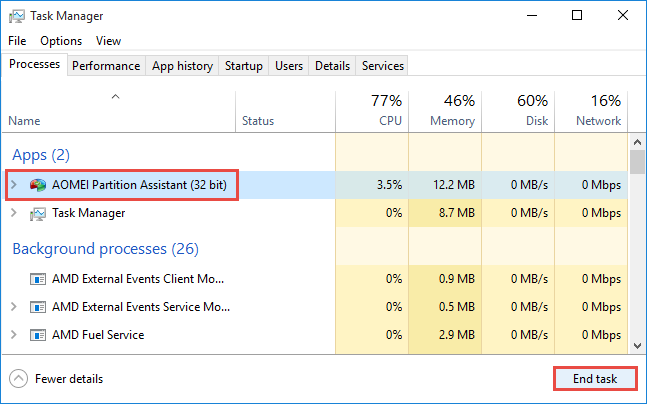
No matter which method you decide to take, you should always deactivate AOMEI Partition Assistant Standard Edition prior to the normal uninstall. To do this, you can launch Task Manager to terminate its associated processes running on the background.
- Press Ctrl+Shift+Esc keys together to bring up Task Manager.
- Select AOMEI Partition Assistant Standard Edition, and click End Task.
Way 1: Uninstall AOMEI Partition Assistant Standard Edition via Windows Built-in Uninstall Applet
Once installed correctly, AOMEI Partition Assistant Standard Edition should be successfully uninstalled by accessing to Windows Control Panel. Here are the detailed steps for different OS users to perform a basic uninstall.
For Windows 7 users:
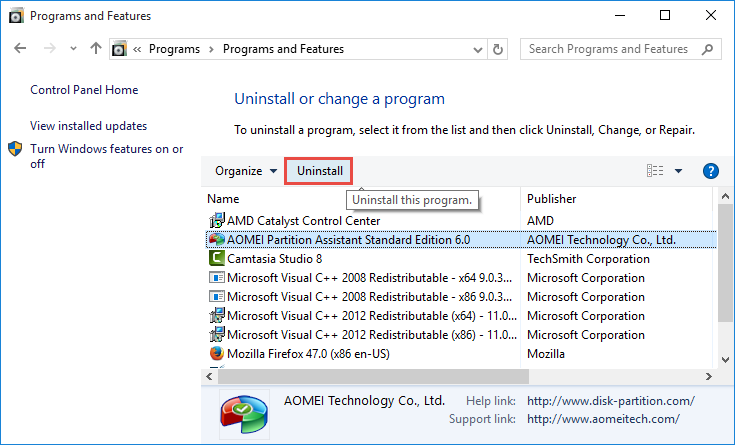
- Access to Start > Control Panel > Program to open Programs and Features panel.
- Scroll through to locate AOMEI Partition Assistant Standard Edition in the list of installed programs, highlight its icon and then click Uninstall button.
For Windows 8 users:
- Right click Start menu and then click Programs and Features from the list.
- Highlight AOMEI Partition Assistant Standard Edition and click Uninstall.
For Windows 10 users:
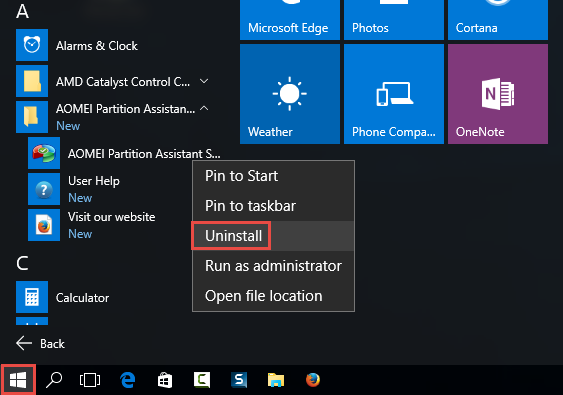
- Click Start > All apps to open the full list of installed programs.
- Locate AOMEI Partition Assistant Standard Edition, right click on the entry, and then click Uninstall button. Then click Uninstall option in Control Panel.
- Windows 10 users can also open Settings, head to System > Apps & features, and then click Uninstall after selecting AOMEI Partition Assistant Standard Edition.
After that, the AOMEI Partition Assistant Standard Edition Uninstall window will pop up to ask for your confirmation. Once you click the Yes, the uninstall request will be handled instantly, and the whole process may takes a few seconds to complete.
Way 2: Run AOMEI Partition Assistant Standard Edition Built-in Uninstaller
Many programs will come with a dedicated uninstall program which you can make use of. You can launch the executive program in the installation folder by doing these:
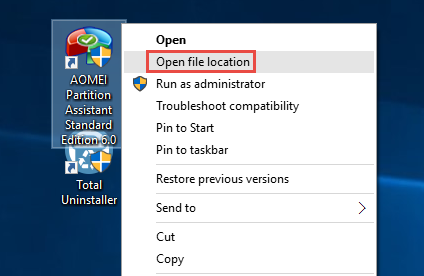
- Right click AOMEI Partition Assistant Standard Edition shortcut on the desktop, and choose Open file location to open up its installation folder.
- Scroll through in the opened window to locate the file named unins000.exe.
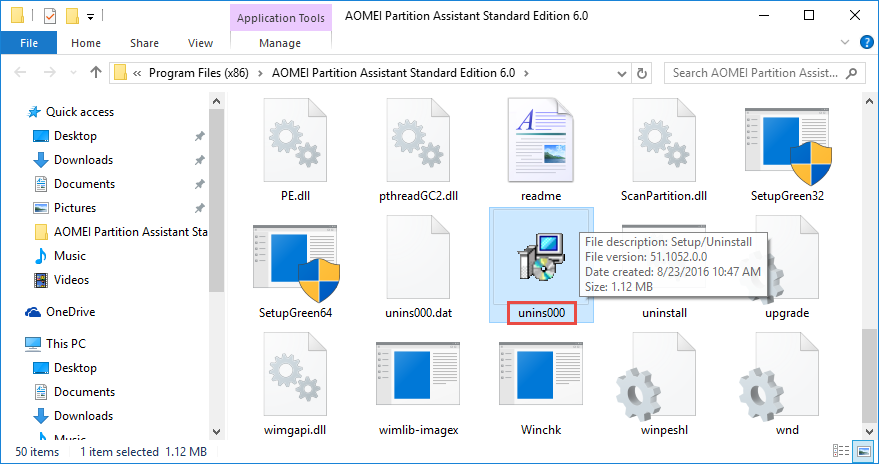
- Double click to run the uninstaller, and click Yes in the pop-up window.

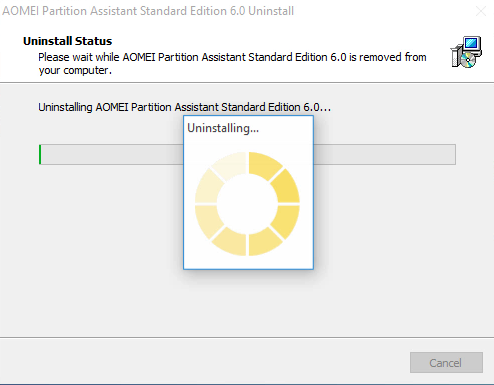
- Wait for the process to be completed, and then click OK to exit the wizard.
Tip: If some of the executive files are damaged or deleted, the aforementioned ways may fail to work effectively, and issues appear like AOMEI Partition Assistant Standard Edition doesn’t show up in the list of installed programs, or the uninstall process is stopped by unknown error. If that’s what you are faced with, try this solution: re-install AOMEI Partition Assistant Standard Edition to cover corrupted/missing files, and then uninstall it after rebooting in Safe Mode.
Wait... What about AOMEI Partition Assistant Standard Edition Residuals?
Don’t forget to check for the program residuals after a normal uninstall. In our test, some components of AOMEI Partition Assistant Standard Edition do leave behind even the main executive program has been removed. So continue with the steps:
1. Delete entries in Windows Registry
- Go to Start > Run, type "regedit" and hit Enter to launch Registry Editor.
- Click Yes if you are prompted to give confirmation in UAC dialog.
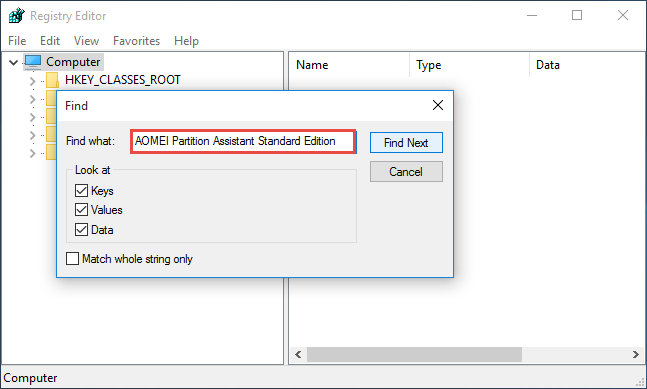
- Click the Find from Edit menu, type AOMEI Partition Assistant Standard Edition in the Find box, and then hit Enter key to start searching matched items in Registry.
- Once found, right click on the key or value and choose delete option from the list.
- Hit F3 to locate the next entry associated with AOMEI Partition Assistan.
Warning: You must be very cautious when making changes on Windows Registry. Inexperienced users are not recommended to modify the registry without making a backup copy, cause serious issues may occur if you mistakenly delete keys or values there. If you are not confident in accomplish this part, we suggest you to utilize an professional uninstaller or a registry cleaner to get the job done automatically.
2. Remove leftovers in Hard Drive
- Head to Start > Control Panel > Folder Options, and then select the View tab.
- Check the "Show hidden files and folders" in Advanced settings and click OK.
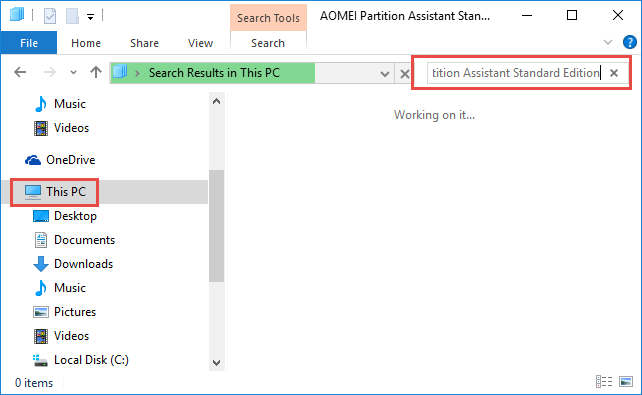
- Click This PC on the desktop (or press Windows + E ) to open File Explorer.
- Type AOMEI Partition Assistant Standard Edition in the Search Bar.
- Identify and delete AOMEI Partition Assistant components in the search result.
The first second ways listed here will require you to carry out the uninstallation manually, which means you will need to spend a little more time & energy in the whole process. For some users these instructions may be confusing. If you want to solve the uninstall issue effortlessly, try adopting the recommended solution below.
Way 3: Remove AOMEI Partition Assistant Standard Edition within Clicks
(Strongly Recommended for All-Level Users)
Tired of performing so many operations to remove AOMEI Partition Assistant Standard Edition? Desired to find an one-station solution to resolve any program issue? Then a reputed uninstaller might be what you’re looking for. Total Uninstaller is a handy utility equipped with powerful uninstall engine. Let’s see how it work first.
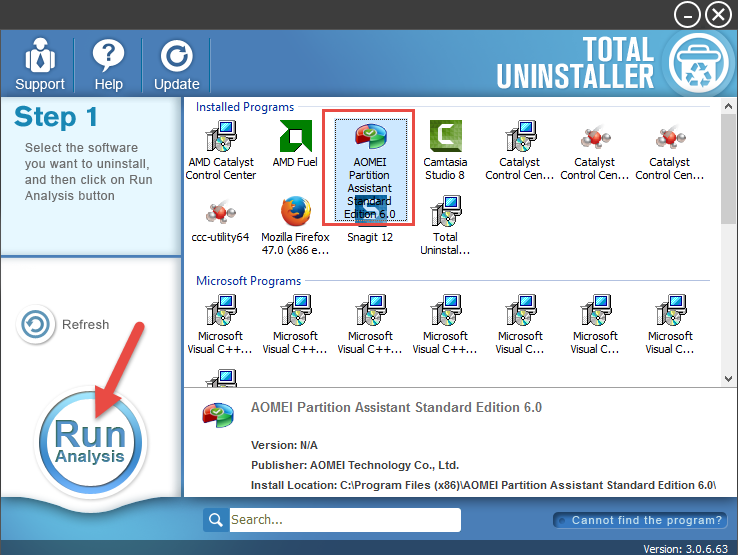
Step 1: select target program
Run Total Uninstaller after turn off AOMEI Partition Assistant Standard Edition.
Click AOMEI Partition Assistant Standard Edition icon, and click Run Analysis.
Step 2: perform the uninstall
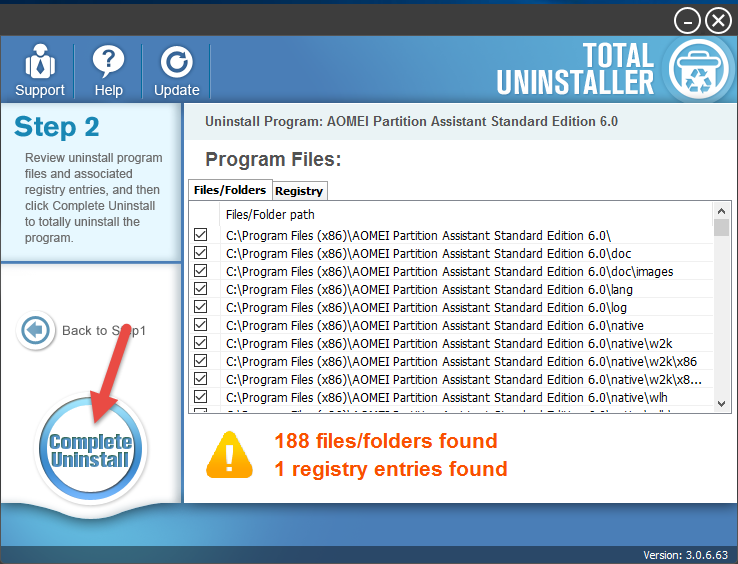
- Click Complete Uninstall after all the components have been scanned out.
- Click Yes in the pop-up dialog and follow on-screen prompts to finish the uninstall.
Step 3: Delete Program Leftovers
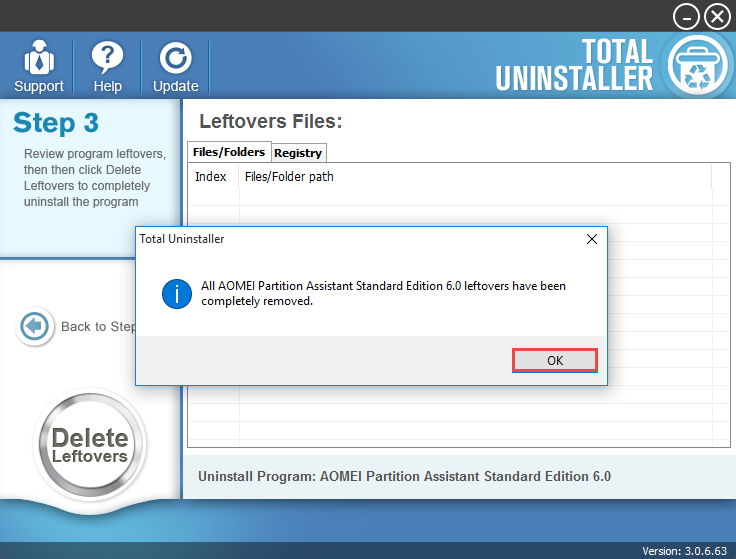
- Click Scan Leftovers and then Delete Leftovers to perform complete removal.
- Click Yes and OK to finish AOMEI Partition Assistant Standard Edition removal.
Well, that’s the whole steps you need to take to fully uninstall AOMEI Partition Assistant Standard Edition. Incredibly simple, right? Why not give it a try now?
Video Tutorial - Uninstall AOMEI Partition Assistant Standard Edition
Tip: For the program that does not appear in the interface, you can perform a force uninstall to get rid of it. Here is the process: click “Cannot find the program” button in Step 1, specify the installation folder of target program in the pop-up window, and click Scan button to continue uninstallation with Step 3. Force Uninstall Mode can be used to effectively remove those corrupted/problematic/malicious/stubborn programs.
If there is still problem in uninstalling AOMEI Partition Assistant Standard Edition, don’t hesitate to contact us for help, or leave your question in the comment section.


