Uninstall Driver Support Safely from Windows System
Don't know where to start to uninstall Driver Support on PC? You may need to learn an effective and safe way to remove this utility from the Windows PC.
What is Driver Support
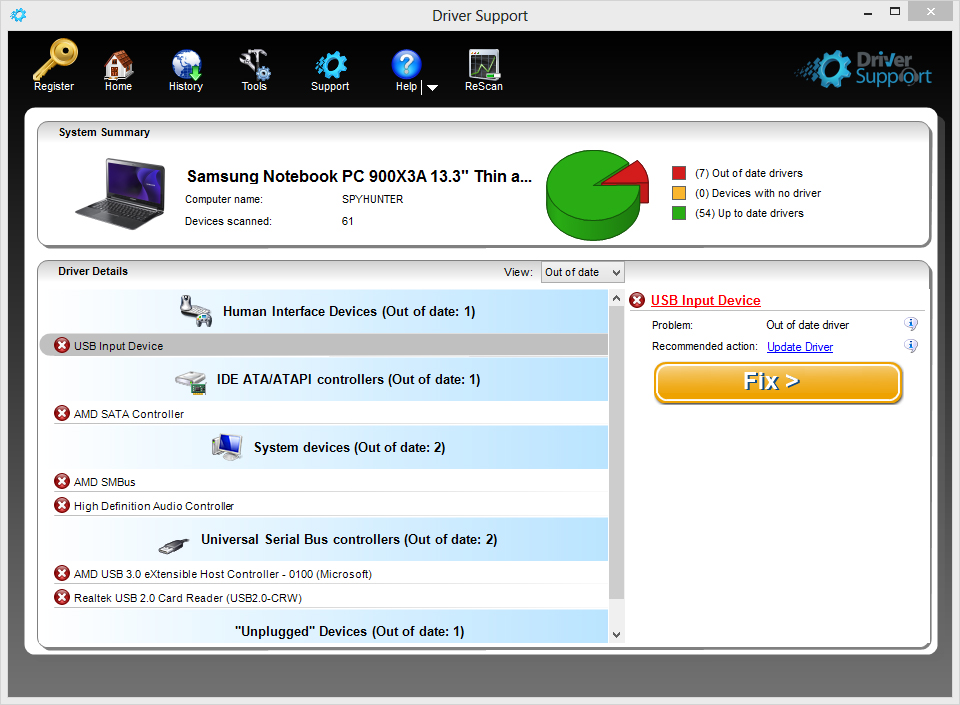
Computer driver is an intensive part on the device that many common people don't know much about it. So most of them would like to take an utility like Driver Support to manage and resolve driver issues. Driver Support is an application developed by PC Drivers HeadQuarters, Inc. And claims to provide a convenient and innovative way to update and troubleshoot the driver problem on computer.
The program gets a very slight install package, so people usually can download and install the app quickly on their PCs. Upon installation, it will create an installation folder on the specified location, an auto-start registry entry and additional registry keys will locate on the system's registry. And additional registry keys and caches are also created after using the program on computer.
Where we should start to remove it
To remove Driver Support from Windows, we can choose to the most traditional way to uninstall it from computer - making use of the removing feature attached in the Windows OS, or you can take a specific removal tool to uninstall it more quickly and easily.
Uninstall Driver Support via the following available ways
Use Windows attached removing feature
Step 1
Exit the program from running
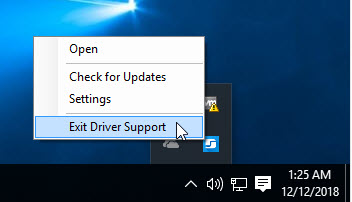
Step 2
- Windows XP: click on the Start button in the bottom left corner, select Control Panel on the menu, and double-click on Add/remove programs
Windows 7: click on the Windows/Start button - Control Panel - Uninstall a program
Windows 8/8.1/10: right-click on the Windows button - select Programs and Features - Scroll down and select Driver Support on the list, and click Uninstall
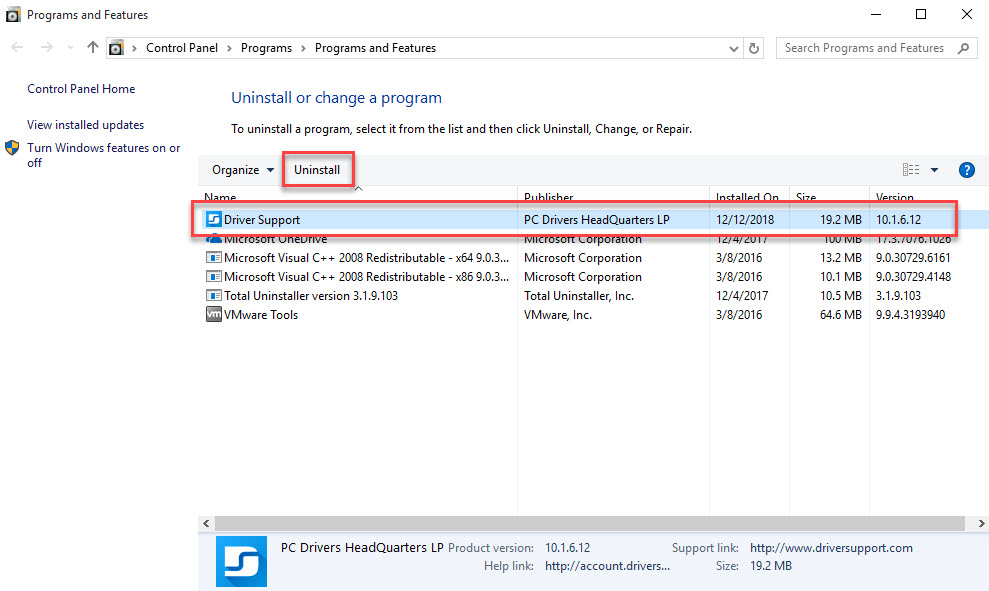
- Click Yes if you need to confirm the app removal
- Hit Uninstall at the bottom to start the uninstallation

- When finish, the uninstall wizard will be closed automatically
- Next, you should stop all running applications and restart the computer
- Click Search on the Start menu, and type "regedit" in the box
- Choose to open regedit to open system's Registry Editor
- Unfold all registry groups, and delete those registry keys belonging to the Driver Support or its developer
Pay attention to the System Registry
Considering there are plenty of important registries storing on the Registry Editor, which are essential for the system's or applications' operation on the computer. You should be very careful when deleting the registry. And you can also choose to export the registry for a back-up in order to avoid a removing mistake.
Take advanced app remover to uninstall Driver Support
If you want the app removal becomes much easier and faster, you can apply a professional removal tool to help you handle the app uninstallation on the computer. The specific utility is good at dealing with the removing problems, and can help you complete different kinds of app uninstallation with ease.
To uninstall Driver Support, you can try to use Total Uninstaller to perform the app removal for you. It is able to scan out all of associated components and possible leftovers, and allow you to complete a program removal within a few of minutes.
- Launch the Total Uninstaller on the computer
- Highlight Driver Support app on the menu, and click on Run Analysis
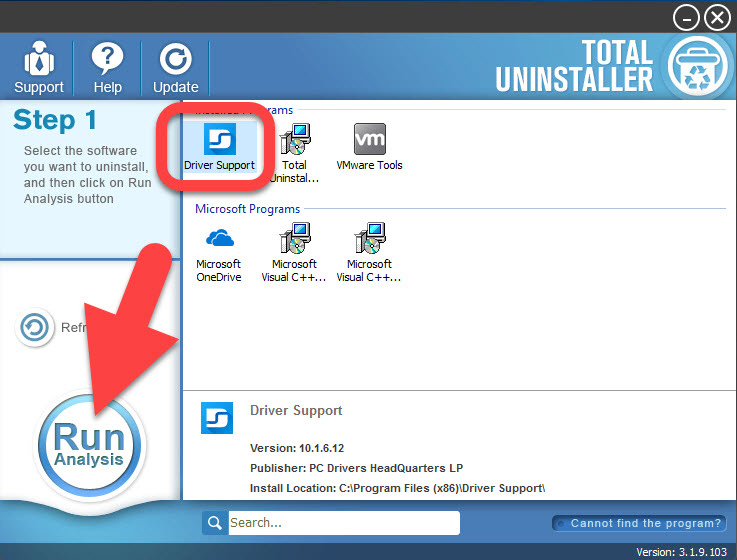
- Quickly, associated files and components will be scanned out and listed on the menu
- Click on the Complete Uninstall button at this time, and click Yes to make sure the removal
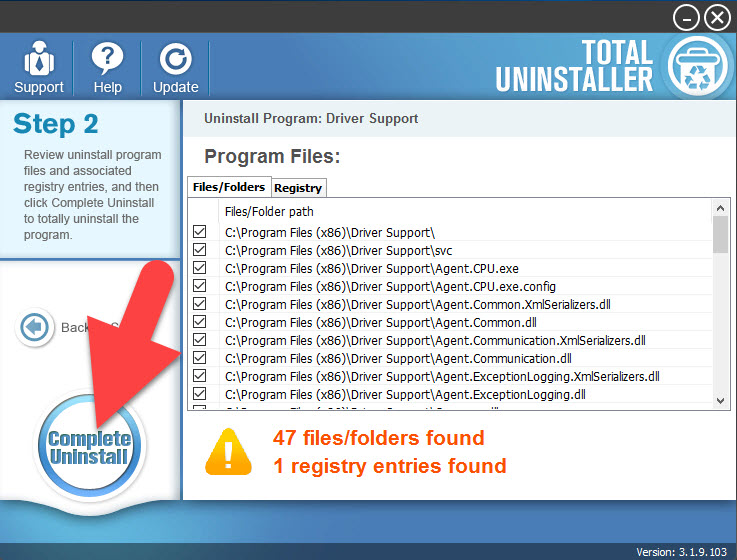
- Next, click on Uninstall on the wizard to start the program removal
- When finish, continue to click on Scan Leftovers button on Total Uninstaller
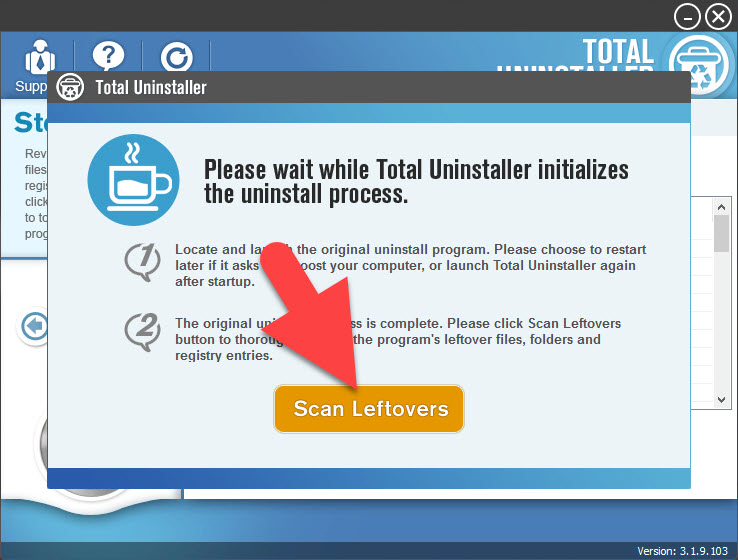
- After that, click on Delete leftovers button to perform the last step of removal
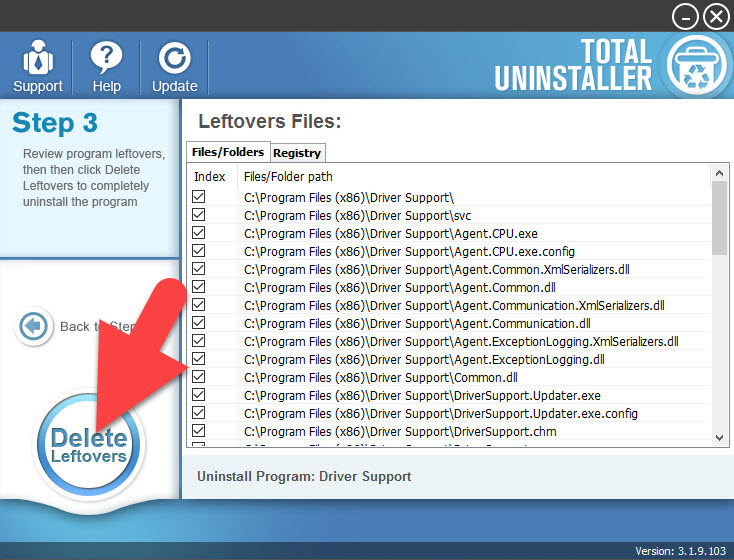
- Click on OK to complete the whole removal, and the last but not least, don't forget to restart your computer.
When finish to uninstall Driver Support, you can continue to use this tool to remove other applications you want. It is not only available for uninstalling one type of program.


