How To Uninstall Google Chrome Properly - Detailed Removal Guide
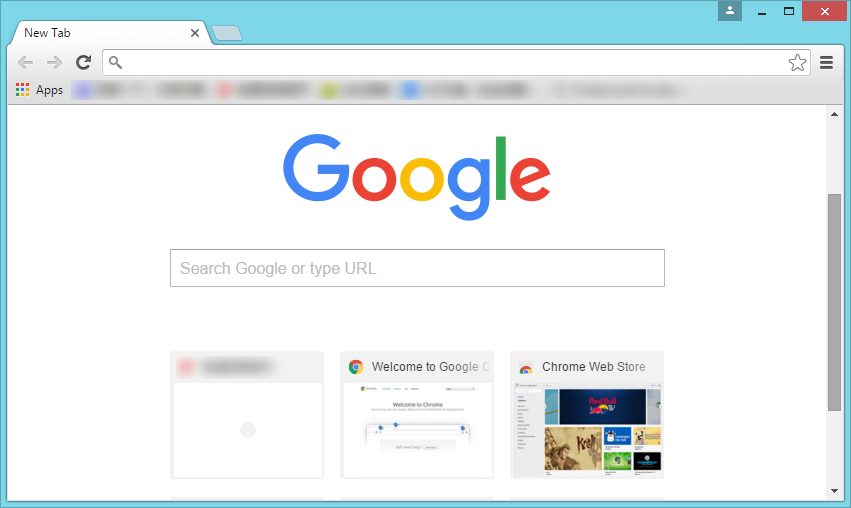
Detailed Information About Google Chrome:
Google Chrome is a freeware web browser developed by Google, aiming at providing a fast, safe and easy browsing experience. Its versatile features, superior speed and customization options make it a competitive product among the peers like Firefox and Internet Explorer. Even so, it has its own shortcomings, and not all users are satisfied with or accustomed to Google Chrome. Well, no matter for what reasons you wanna uninstall Google Chrome, there is one thing you need to know: simply uninstalling Google Chrome from Control Panel does not equal a 100% removal. The main executive program files may be removed while its preference settings, personal data, cache files and registry entries still remain around you whole system. Additionally, you may also run into different issues in the uninstallation of Google Chrome, like:
- Google Chrome does not appear in Windows installed program list.
- Add/Remove Program applet fails to activate the default uninstaller.
- Some executive files of Google Chrome have been deleted or corrupted.
- Google Chrome keeps popping up after the standard uninstall is completed...
Looking for an effective way to remove Google Chrome? In this tutorial we will show you the detailed steps. Here are two removal methods you can try if you are not able to uninstall Google Chrome, and also if you wanna remove and then reinstall it.
Way 1: Uninstall Google Chrome Within A Few Clicks
If you prefer to save time/energy in uninstalling Google Chrome, we recommend you to try this handy tool first. Total Uninstaller is a lightweight yet effective remover designed for all level Windows users. Its intuitive interface will guide you through the whole removal of Google Chrome automatically. Watch the video provided below, and you will have a direct experience how fast and easy the uninstall process can be.
> Turn off Google Chorme, and then launch Total Uninstaller.
> Click Google Chrome and click Run Analysis to proceed.
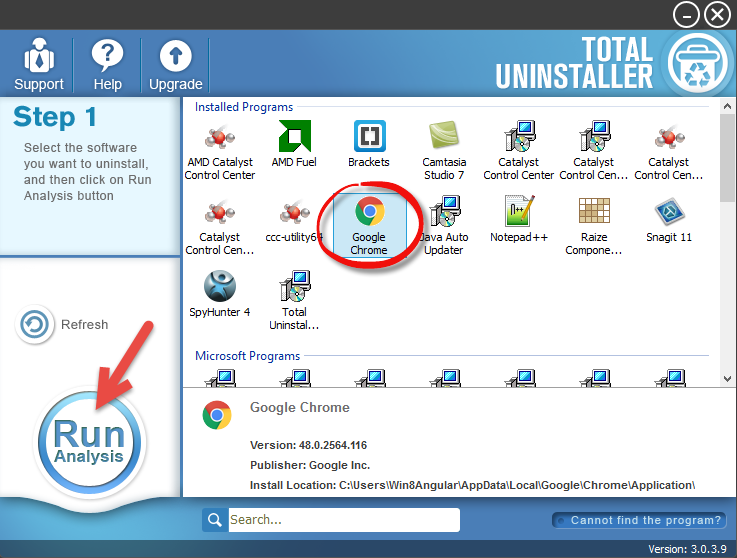
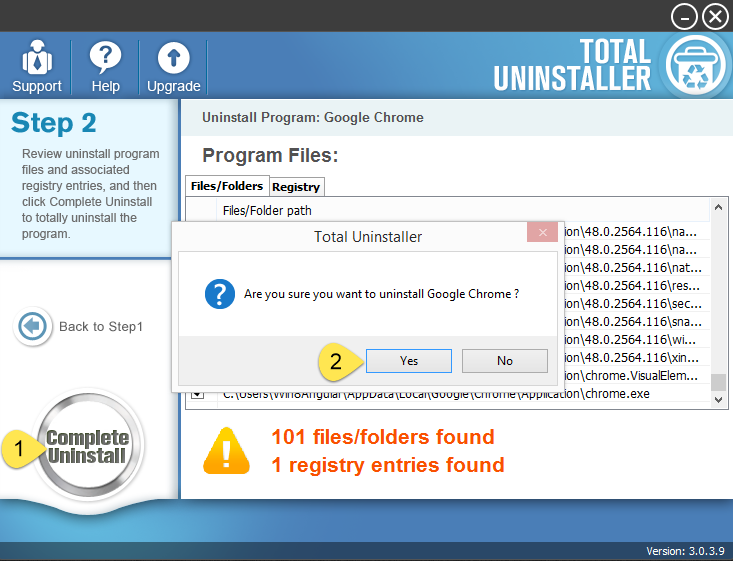
> Click Complete Uninstall after all the the components have been scanned out.
> Click Yes in the pop-up dialog and follow the prompts to complete the uninstall.
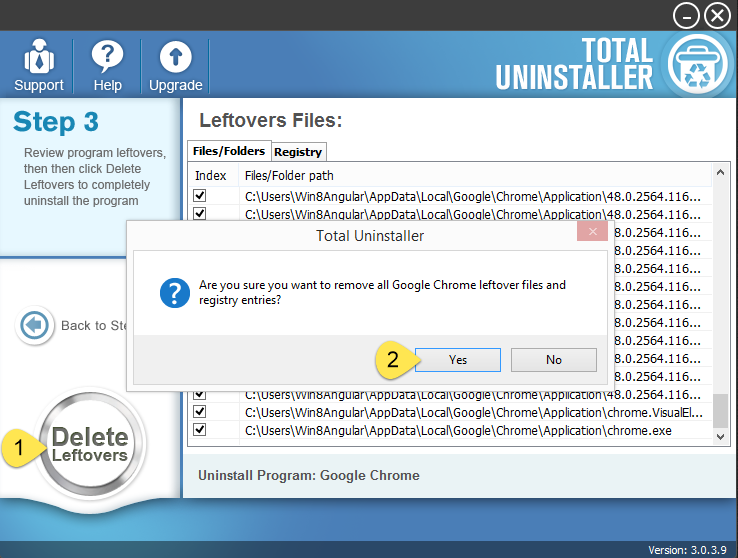
> Click Scan Leftovers and then Delete Leftovers to perform complete removal.
> Click Yes in the dialog and then OK to end Google Chrome removal.
See? Google Chrome can be thoroughly removed from your system in a few clicks. This removal tool enables you to get rid of any problematic, corrupted, or malicious program. No stubborn trace left, and no extra work needed. Incredibly simple.
Way 2: Remove Google Chrome & Leftovers Manually
Here are the manual steps to uninstall Google Chrome. You should log in to you computer with your administrator account, and then follow the instructions below:
Step 1. Shut Down Google Chrome
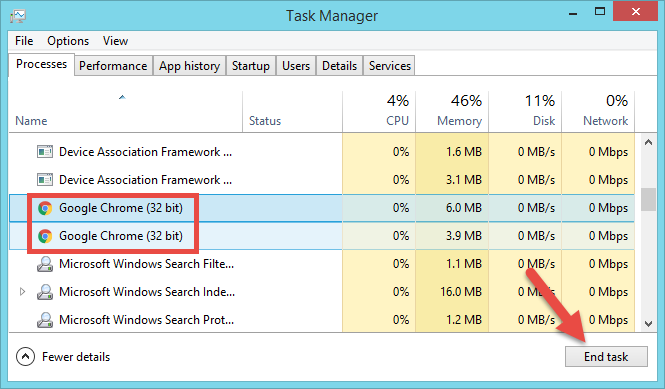
If Google Chrome is running, make sure to close all the opened Chrome Windows, and then activate Task Manager to terminate the background processes.
- Right click the taskbar at the button and select Task Manager option.
- Select the processes related to Google Chrome and then click End Task.
Step 2. Uninstall Google Chrome
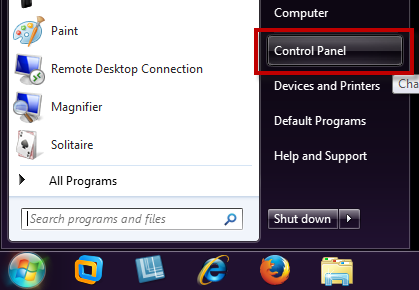
On Windows 7 :
- Access Control Panel from Start menu, and click Program in the Control Panel.
- Scroll through to select Google Chrome, and then click Uninstall button.
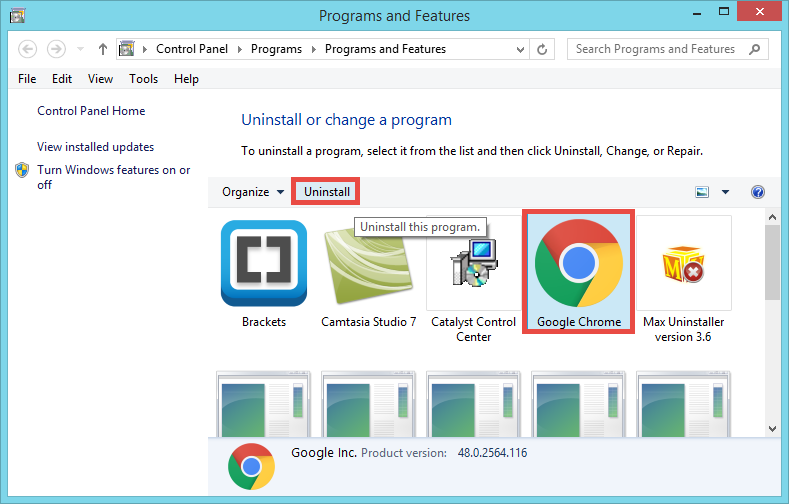
On Windows 8/10:
- Right click Start icon and select Programs and Features option in the list.
- Locate Google Chrome entry, and double click it to activate default uninstaller.
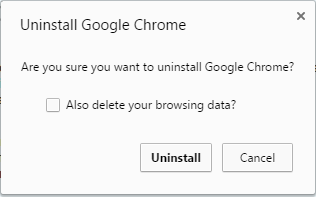
- Select the “Also delete browser data” checkbox if you would like to delete your user profile information,and then click Uninstall to start uninstallation.
- After the uninstall process is finished, restart your computer to take effect.
In case the Add/Remove Programs applet does not work to uninstall Google Chrome, you can activate the built-in uninstall by using this alternative approach:
- Right click Google Chrome shortcut and choose Open file location.
- Navigate to the installation folder of Google Chrome in the opened window.
- Locate the executive program named Uninstall.exe to start the uninstall.
Step 3. Delete Google Chrome Remnants
As is mentioned above, some Chrome files will not get removed with standard uninstall. Sometimes you need to manually delete those remnants. To check if Google Chrome has been fully removed from the registry and hard disk, do the followings:
(1) Invalid keys/values in registry
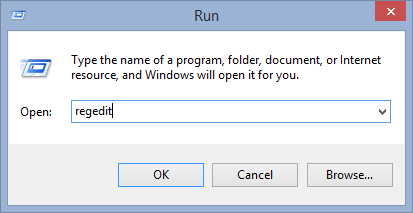
- Go to Start > Run, type "regedit" and hit Enter to launch Registry Editor.
- Click Yes if you are prompted to give confirmation in UAC dialog.
- Press Control +F together to open the Find box and then type Google Chrome there.
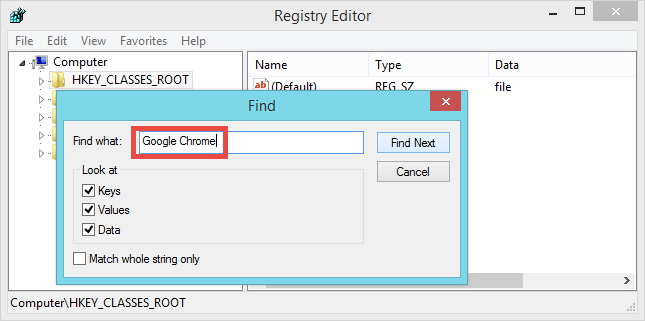
- Hit Enter (and then F3) to locate the entries associated with Google Chrome.
- Right click on the keys or values and choose delete option in the list.
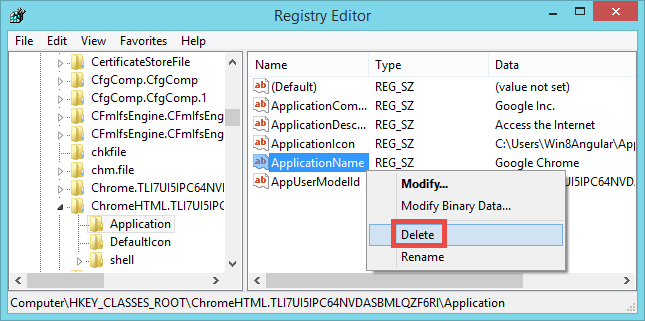
Notice: We only recommend advanced computer users to manually delete Google Chrome leftovers in Windows Registry. Any improper modification may result in severe problem or even system crash. Always backup your registry before making any change there. Also, you can use a registry cleaner instead to save troubles.
(2) Junk files/folders in hard disk
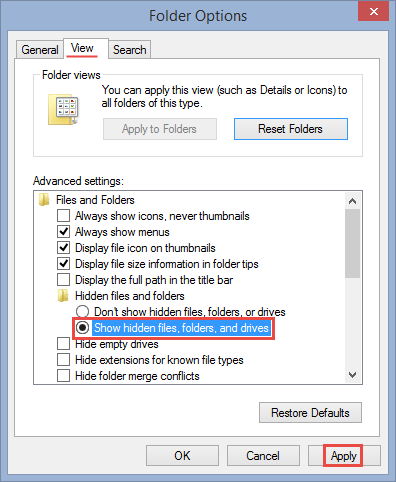
- Head to Start > Control Panel > Folder Options, and then select the View tab.
- Check the "Show hidden files and folders" in Advanced settings and click OK.
- Click This PC on the desktop (or press Windows + E ) to open File Explorer.
- Type Google Chrome in the Search Bar and wait a few seconds.
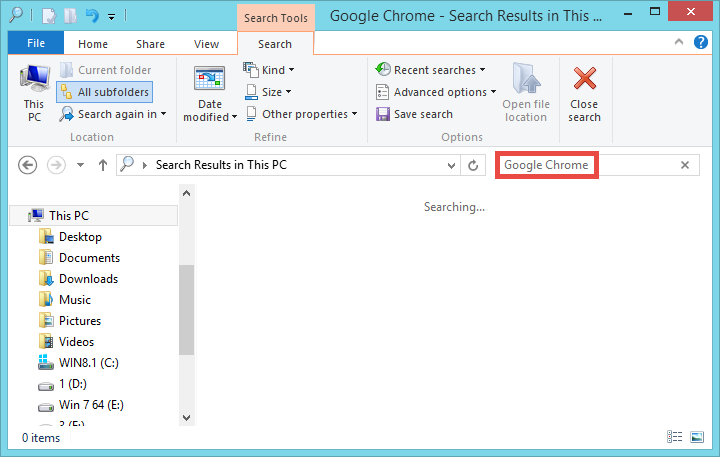
- Identify Rockstar Games leftovers in the result and delete them permanently.
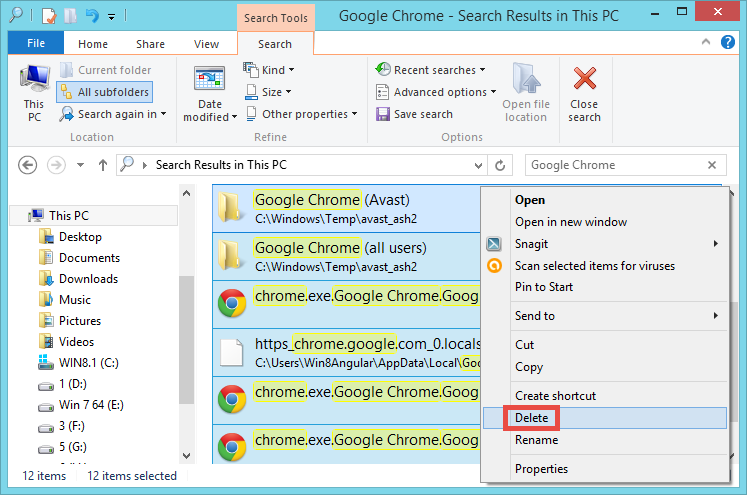
After performing all these steps you should be able to fully uninstall Google Chrome. Comparing with this conventional uninstall method, the automated removal tool comes in handy to both inexperienced and advanced users. Anyway, choose the suitable way you wanna try to uninstall Google Chrome from Windows.
Is this article helpful for you? Share your thoughts on the comment section below.


