How to Uninstall Picasa Completely Without Removing Images
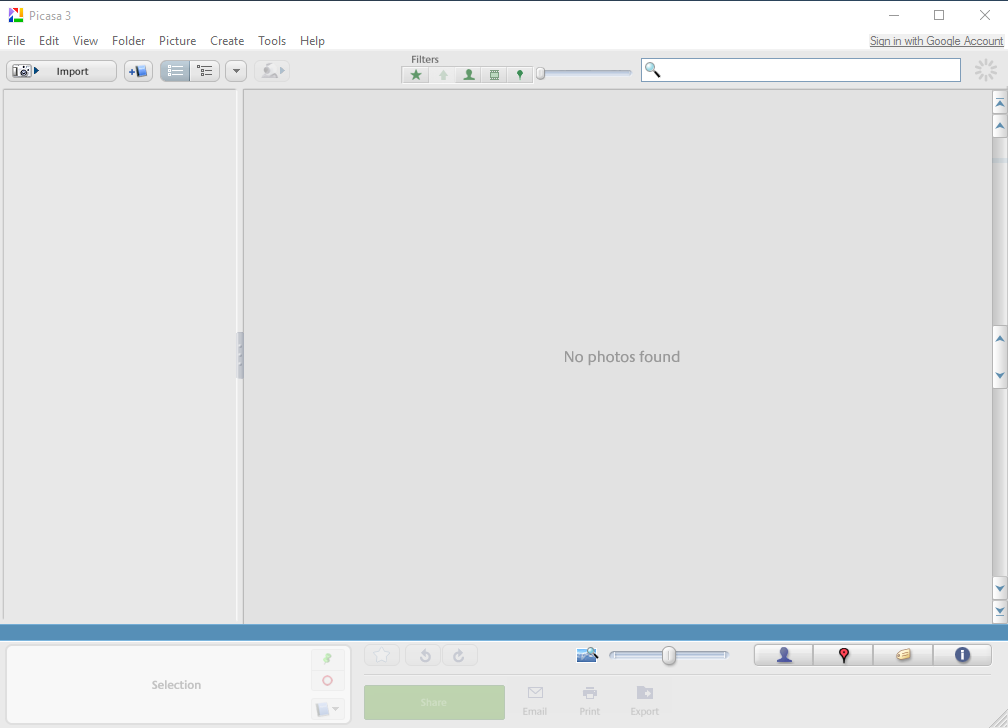
Wanna uninstall Picasa but worry about the program cannot be totally removed? Or all of your photos will be removed with the app? Take it easy, let's see how does it can be uninstalled safely and thoroughly from the PC now.
Basic information of Picasa
Picasa is an image organizer and image viewer for organizing and editing digital photos, it is created by Lifescape but later acquired by Google in July 2004. However, in order to provide a better and more sophisticated photo app (Google Photos), Google decided to close this service in May 1, 2016. So, if you are still having this program installed on your PC, you should notice that it has been stopped offering further services and updates from Google.
Does Picasa removal affect your photos?
Many people are worry about removing Picasa will also delete their important photos, but the fact is that Picasa is only used to showing and organizing your photos, without saving any photo in the program itself, therefore, all of your photos won't be deleted when you uninstall Picasa. And how can remove the program completely from the computer? You can refer to the following uninstall guides and choose the best way you think to perform the removal on your PC.
Effective guides to uninstall Picasa thoroughly from Windows
1. Remove it with Windows built-in uninstaller
This is a traditional and manual way to remove the program, in case of some users are not familiar to the computer and easily make manual error, it is suggested to back up your photos beforehand.
- Go to the desktop, and click on the Windows button at the bottom left corner
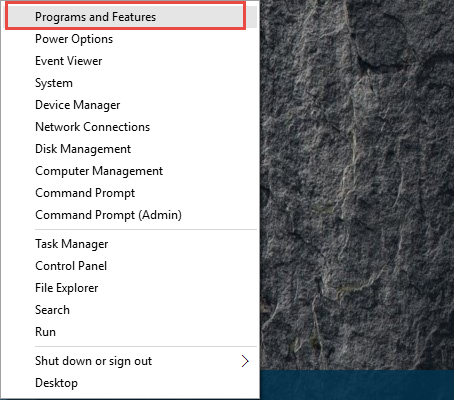
- Select Programs and Features which is the first item on the menu
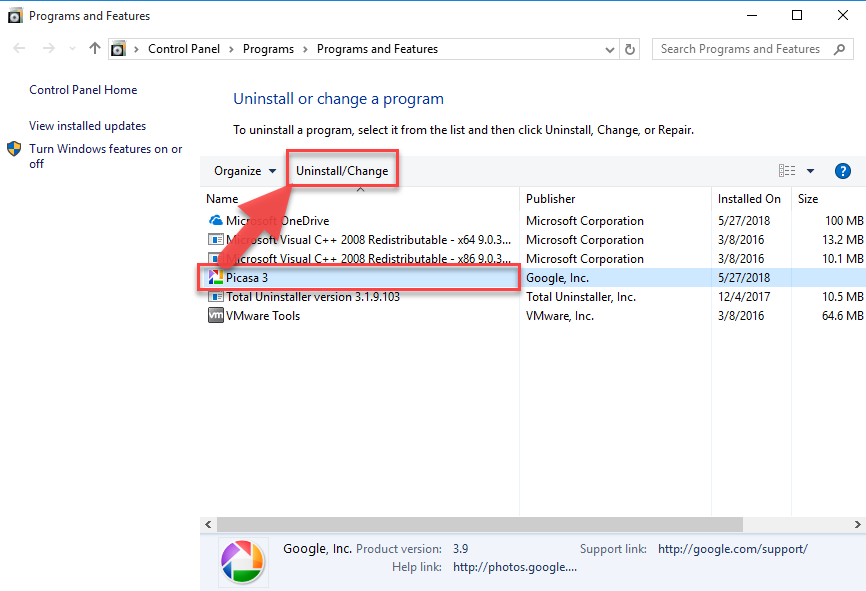
- Locate Picasa on the list of programs, and click on Uninstall/Change
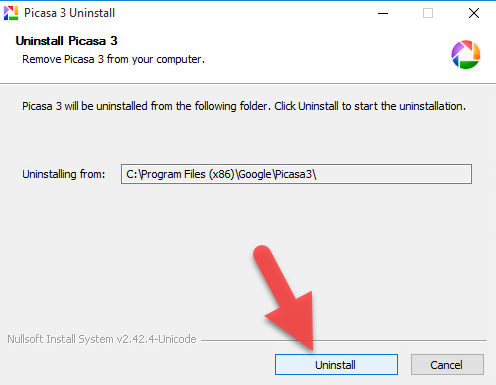
- Click on Uninstall button on the setup window
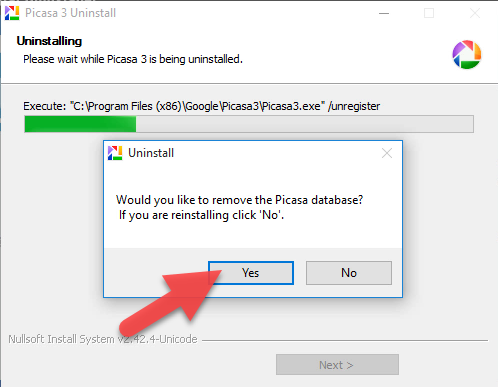
- Click Yes to confirm the app removal
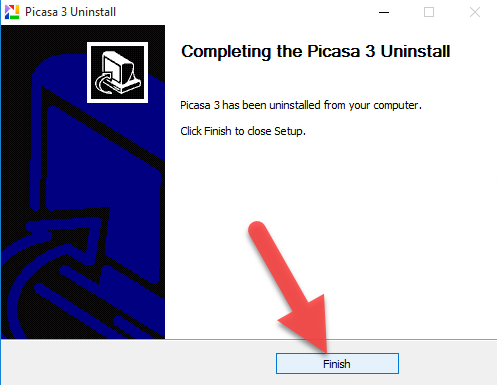
- Hit Finish to close the setup
- Close the running apps on your PC, and reboot the computer
- Log-into the system again, pen the Windows' search box
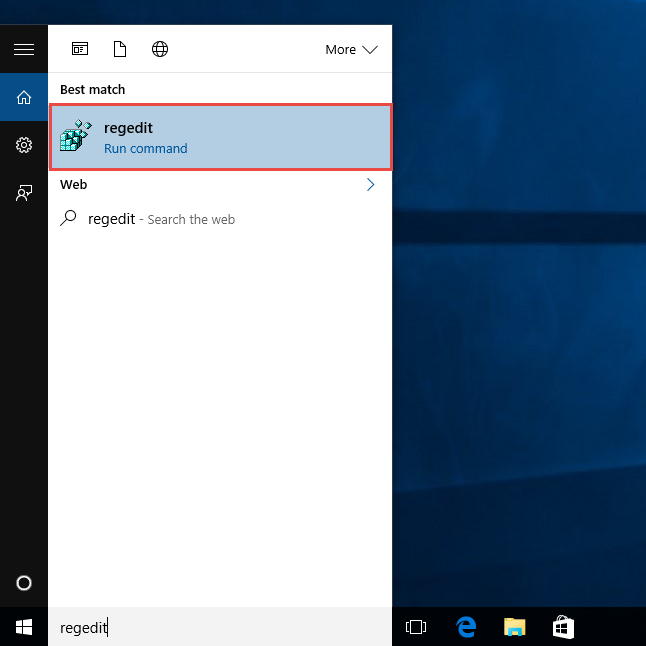
- Type "regedit" to open the Registry Editor of the system
- Expand and check the registry keys inside
- Delete the registry keys belongs to the Picasa
What's Registry Editor?
Registry Editor is an important place in Windows system, and used to stored the Windows system and installed applications' registries, sometimes computer experts will need to modify the registries inside to fix some error issues. Therefore, if you are not good at computer, please be very careful to modify or delete the registry inside.
2. Uninstall it with the program's uninstall process
- Go to the desktop of your computer, and right-click on the shortcut of Picasa
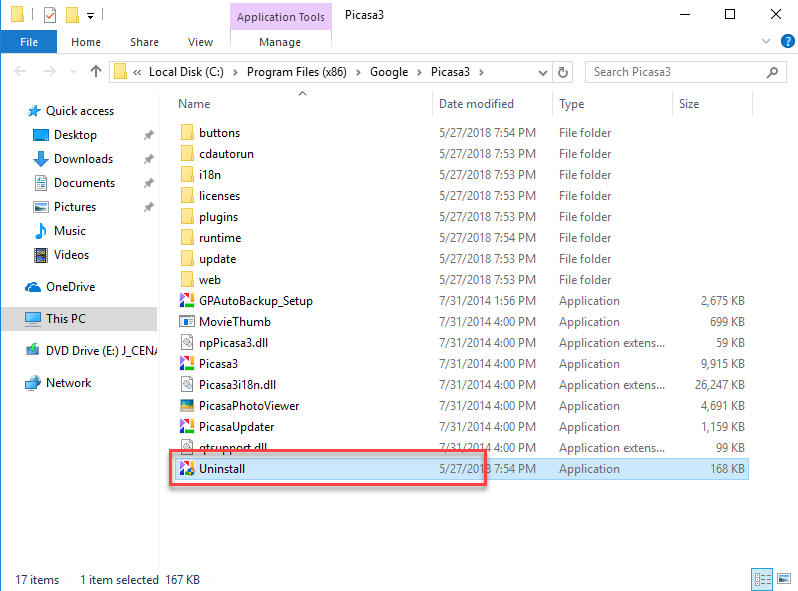
- Select Open file location, and browser the list of its installed files until you find the uninstall process inside
- Double-click on the uninstall executable file,
- Click Uninstall button on the setup window to start the removal
- Wait the removing process come to the end, and click on Finish to close the setup
- Restart your Windows system and log-in again
- As the manual removing steps in approach 1, you should open the Registry Editor, and delete those registry keys which are belonging to Picasa application or publisher
3. Uninstall Picasa more effectively with Total Uninstaller
If you are not willing to conduct the app removal, and also want to skip the risky and complicated registry removal, you can apply Total Uninstaller to complete the removal for you.
Total Uninstaller is an automated uninstall tool for Windows computer, it can be a good alternative to perform a complete removal for the unwanted app on the PC. To uninstall Picasa in a quick way, you can apply this utility and conduct the removal with the following instructions with images and video guides:
- Launch the Total Uninstaller on the computer
- Select Picasa on the menu of installed programs, and click on Run Analysis
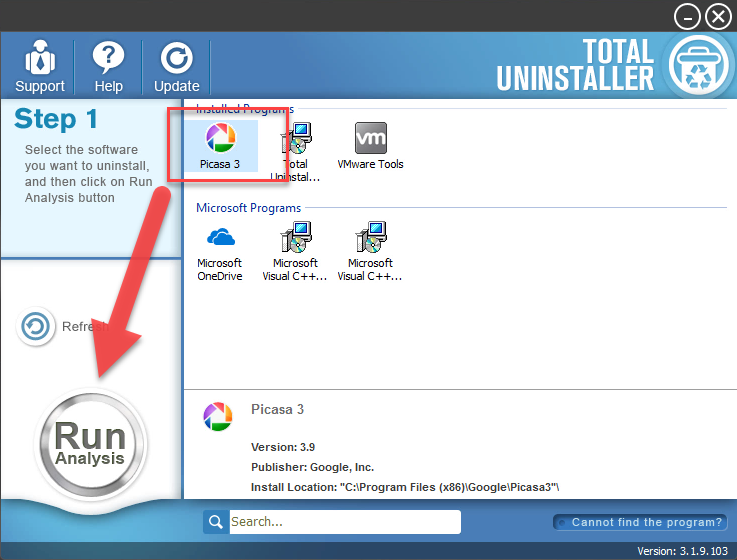
- After a while, associated files and components will then be detected and listed on the menu, and please click on the Complete Uninstall button
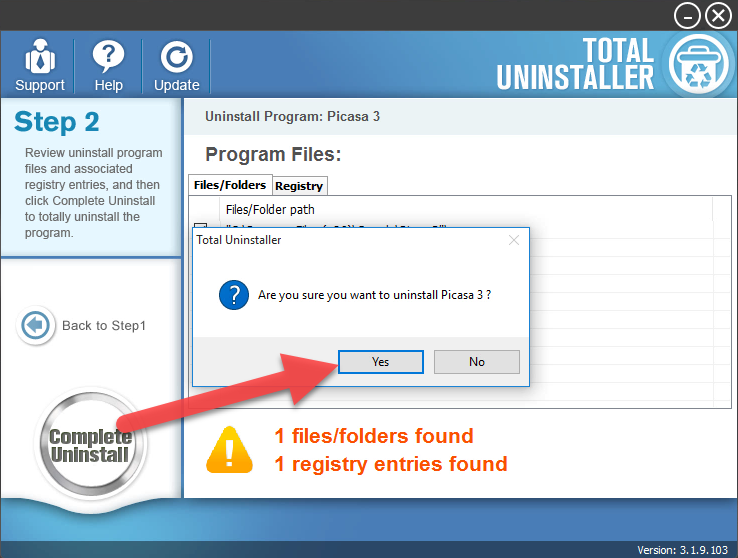
- Click Yes for confirmation, and click on Uninstall on the wizard
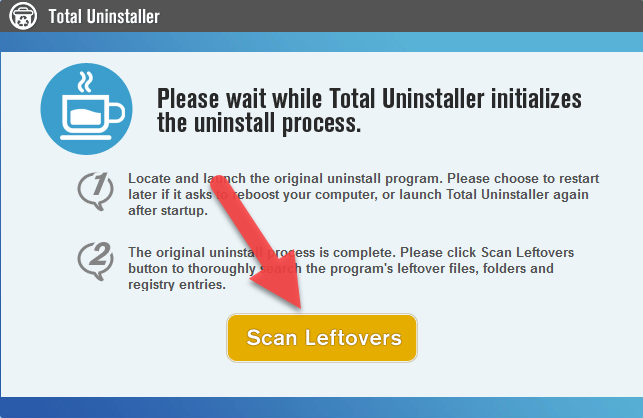
- Click on Close then the uninstallation complete
- Click on Scan Leftovers button, and delete all of detected files on the list
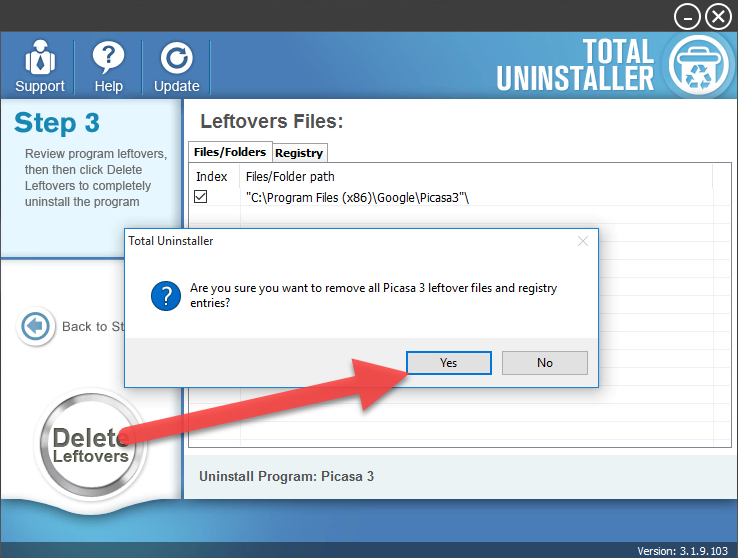
- Click on OK to complete the whole removal, and then you can exit the uninstaller and restart the your computer


